阿里云服务器 学习笔记
2022-07-23
- 使用 RMarkdown 的
child参数,进行文档拼接。 - 这样拼接以后的笔记方便复习。
- 相关问题提交到 Issue
1 配置
参考 M小白 (2019)


1.4 传输文件
apt-get install -y lrzsz安装报错
apt-get install -y lrzsz
Reading package lists... Done
Building dependency tree
Reading state information... Done
E: Unable to locate package lrzsz
参考 https://blog.csdn.net/llh_1178/article/details/72848549 解决办法是
apt-get updaterz进行传输
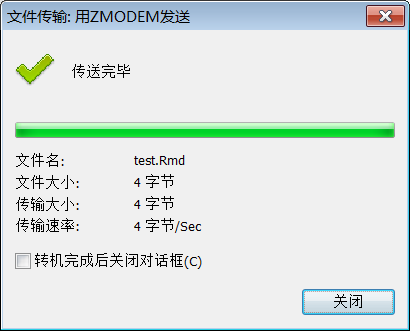
image
:~# ls
test.Rmd
:~# pwd
/root
1.4.1 rz,sz
参考 https://blog.csdn.net/lengyue1084/article/details/51284458
yum install lrzszrz,sz是Linux/Unix同Windows进行ZModem文件传输的命令行工具,但是windows端需要支持ZModem的telnet/ssh客户端,比如xshell或者SecureCRT才可以使用。这两个命令也很好区分,sz:将选定的文件发送(send)到本地机器,s作为send的简写;同理,rz:运行该命令会弹出一个文件选择窗口,从本地选择文件上传到服务器(receive),r作为receive的简写。 (知乎专栏)
1.5 安装 miniconda
参考 3.3 conda,下载后传入

传输比较慢。
参考 https://mirrors.tuna.tsinghua.edu.cn/anaconda/miniconda/?C=M&O=D 直接在服务器内下载。
wget https://mirrors.tuna.tsinghua.edu.cn/anaconda/miniconda/Miniconda3-latest-Linux-x86_64.sh:~# bash Miniconda3-latest-Linux-x86_64.sh
Welcome to Miniconda3 4.7.12
In order to continue the installation process, please review the license
agreement.
Please, press ENTER to continuenano .bashrc输入
#Anaconda
export PATH=/home/root/miniconda3/bin:$PATH
source .bashrc 重新激活。
Miniconda3 will now be installed into this location:
/home/user/miniconda3

  - Press ENTER to confirm the location
  - Press CTRL-C to abort the installation
  - Or specify a different location below
==> For changes to take effect, close and re-open your current shell. <==/root/miniconda3/bin/python重启就成功。
:~# which python
/root/miniconda3/bin/python
激活成功。
1.6 修改 conda 配置
镜像 conda默认的镜像源在国外,下载文件速度可能比较慢。我们需要将镜像源修改为国内的,下载速度会提高很多。
conda config --add channels https://mirrors.ustc.edu.cn/anaconda/pkgs/free/
conda config --add channels https://mirrors.tuna.tsinghua.edu.cn/anaconda/pkgs/free/
conda config --add channels https://mirrors.tuna.tsinghua.edu.cn/anaconda/pkgs/main/
conda config --set show_channel_urls yes1.9 用jupyter操控服务器
首先,在远程服务器上安装jupyter:pip install jupyter
:~# jupyter-notebook --generate-config --allow-root
Writing default config to: /root/.jupyter/jupyter_notebook_config.py
生成配置文件。
from notebook.auth import passwd
passwd()
生成密码。
>>> passwd()
Enter password:
Verify password:
'xxx'
nano ~/.jupyter/jupyter_notebook_config.py在首行加入
c.NotebookApp.ip='*'
c.NotebookApp.password = u'之前的那串sha1字符串'
c.NotebookApp.open_browser = False
c.NotebookApp.port =8888 # 任意端口均可(只要不占用22,80等常用端口)
jupyter notebook --allow-root服务器就在用 jupyter notebook


2 守护进程
2.1 进程守护 jupyter notebook
参考 知乎
守护进程(daemon)是生存期长的一种进程,没有控制终端。它们常常在系统引导装入时启动,仅在系统关闭时才终止。
这样就不需要开着远程端口,服务器可以一直在跑。
参考 知乎
/dev/null是一个特殊的设备文件,这个文件接收到的任何数据都会被丢弃。因此,null这个设备通常也被成为位桶(bit bucket)或黑洞。
不生成日志, 把这个命令,存入到一个 shell 脚本中,这样下次直接调用脚本即可。
nano demo.sh#!/bin/bash
nohup jupyter notebook --allow-root --port=8888 > /dev/null 2>&1 &注意开头声明是哪个软件执行。
chmod +x demo.sh使得脚本可执行。 输入文件名直接执行。
:~# ps -ef|grep jupyter
root     19230     1  0 17:40 ?        00:00:00 /root/miniconda3/bin/python /root/miniconda3/bin/jupyter-notebook --allow-root --port=8888
root     19312 19280  0 17:50 pts/0    00:00:00 grep --color=auto jupyter
这个可以查看当前有哪些进程在跑。
kill -9 18982 强制杀掉某个进程。
然后跑
bash demo.sh守护进程是报错的,如果 jupyter notebook 失效查看是不是内存满了。
:~# jupyter notebook --allow-root --port=8888
[W 02:25:52.065 NotebookApp] WARNING: The notebook server is listening on all IP addresses and not using encryption. This is not recommended.
[I 02:25:52.089 NotebookApp] [jupyter_nbextensions_configurator] enabled 0.4.1
[I 02:25:52.090 NotebookApp] Serving notebooks from local directory: /root
[I 02:25:52.090 NotebookApp] The Jupyter Notebook is running at:
[I 02:25:52.090 NotebookApp] ...
[I 02:25:52.090 NotebookApp] Use Control-C to stop this server and shut down all kernels (twice to skip confirmation).
[E 02:25:52.090 NotebookApp] Failed to write server-info to /root/.local/share/jupyter/runtime/nbserver-9298.json: [Errno 28] No space left on device
OSError: [Errno 28] No space left on device

During handling of the above exception, another exception occurred:

Traceback (most recent call last):
  File "/root/miniconda3/bin/jupyter-notebook", line 8, in <module>
    sys.exit(main())
  File "/root/miniconda3/lib/python3.7/site-packages/jupyter_core/application.py", line 268, in launch_instance
    return super(JupyterApp, cls).launch_instance(argv=argv, **kwargs)
  File "/root/miniconda3/lib/python3.7/site-packages/traitlets/config/application.py", line 664, in launch_instance
    app.start()
  File "/root/miniconda3/lib/python3.7/site-packages/notebook/notebookapp.py", line 1834, in start
    self.write_browser_open_file()
  File "/root/miniconda3/lib/python3.7/site-packages/notebook/notebookapp.py", line 1753, in write_browser_open_file
    self._write_browser_open_file(open_url, f)
OSError: [Errno 28] No space left on device
3 在 Jupyter Notebook 中使用 R
参考 Frigaard (2018)
install.packages(c('rzmq','repr','IRkernel','IRdisplay'),
                 repos = c('http://irkernel.github.io/',
                           getOption('repos')),
                 type = 'source')
IRkernel::installspec(user = FALSE)
安装
rzmq 可能安装失败,参考
GitHub
sudo apt-get install -y libzmq3-dev然后就可以查看到可以使用 R 的 kernel。
